Cinematography Breakdown - Bar Interior - Interview
Hopefully this can become a semi-regular thing I do on here. Maybe, somewhere down the line, it’ll help someone that’s looking for inspiration or guides on how to set up shots of their own. If so that’ll be enough for me.
If there’s one thing that I crave when I’m looking for posts about cinematography online it’s lighting setups with pictures. Knowing the how and why behind choices that different cinematographers make helps me personally feel a stronger connection and understanding to the craft.
A little background for this particular shoot:
I had not been to this location before, so I was going in very blind (A note to producers: please don’t assume cinematographers don’t want to go on scouts and that pictures will suffice! ). This meant that I ran the risk of over-packing our available gear. While I believe in hindsight we used most, if not all, of the things I had us load into the van — I could’ve been even better prepared having been able to scout this location beforehand.
This was going to be a very busy day. Due to the availability of the artist, we were looking at arriving on location at 10am, and being done with two interviews, a musical performance, and b-roll by 3pm. That’s a very fast turnaround per scene. I prefer having an hour to light any given setup as well, which definitely wasn’t going to be possible this time around. We’d have to light fast, and accept that some things may not be perfect. In the end I’m still happy with the results.
I believe this is what all we loaded into the van:
2x c300 mkii
The cameras that are the workhorses for all of the content I shoot currently.
Canon CinE Primes
24, 35, 50, 85
I believe this was a rare case where every lens wound up being used on a shoot as well. For most shoots I find us leaving the 50 in the case, and often the 24 as well. Usually one shooter lives on the 35 and the other on the 85.
Skypanel s60 with Chimera, Full Diffusion, & Honeycomb.
The Skypanel is a heavy, annoying, amazing light. It’s a workhorse with a ton of output. It looks beautiful when diffused and even though I hate loading/moving/lifting it — it’s always worth the effort.
Our two Litemats (a 2L and a 3)
These lights are literal godsends. Lightweight and bi-color, and each comes with its own set of 1/4, 1/2 and full diffusions with frames and grids. These are lifesavers and honestly when I can get away with needing less output I find myself using these over the skypanel for shoots. For how often we were moving around that day, I found myself throwing these all over the place and only using the skypanel for major setups.
DS1
https://digitalsputnik.com/collections/ds1-products/products/ds1-basic-system-us
A great light that’s controllable via an app on your phone. I love having this for a little hair-light or splashing color onto a wall/object in the background. Sometimes I use the full RGB ability of it to balance out a room’s color if I’m not happy with the wall’s color, etc. The fact it can be powered off v-mount is definitely a plus as well.
2 each: 4x4 Flag, 4x4 Silk
I need to order more of these for our kit. We needed many more flags for this day (to black out the front windows of the bar). I’m hoping to find a set of flags that expand to 4x4 but collapse and are heavy duty. The one issue with these 4x4’s is they don’t fit into anyone’s trunk so we have to use the van to carry them around if we want them on set. It’s more of a headache than it sounds like, believe me. Our production van isn’t a great one, and that’s being kind.
4 c-stands, 1 combo stand, 1 matthews stand.
c-stands for flags, diffusion, litemats. Combo for the skypanel. Matthews stand for ds1.
Dana Dolly Kit, rails, stands.
Knowing there’d be a musical performance, I wanted our wide angle on a dolly.
2 Tripods
For interviews. We tend to go for 20+ minutes on each interview and I didn’t see a reason for them to be handheld or on an easy-rig. We would also need one tripod’s head for the Dolly later on.
2 EZ-Rigs
For all B-roll and the close-up shot during the musical performance.
2 Matte Boxes
I knew I wanted filters for this shoot. We have two Wooden Camera Matteboxes, and two 1/4 pro-mist filters which I’ve fallen in love with when it comes to getting certain looks.
2 full apple boxes, and 2 half apple boxes.
I also packed all of our sound equipment for our freelance sound engineer that would be on set, but honestly I know little about sound equipment — so I can’t really say explicitly what all we had on hand for this. I know we had our soundbag for mixing on-set, a boom, and 2 DI boxes (for the performance instruments) + multiple cables/LAVs.
Interview Setup 1
The first setup of the day was an interview with someone that worked at the label that had signed the artist. According the shoot schedule I’m looking at, we had 45 minutes after landing at the location to be lit and ready for her. Technically we were supposed to be “set” at 10:45 and she wasn’t slotted to arrive until 11am which gave us a little extra space. What wasn’t calculated was that we’d need to actually unload the whole van, build out the gear, and have cameras set — so we were cutting it a bit close by the time she arrived.
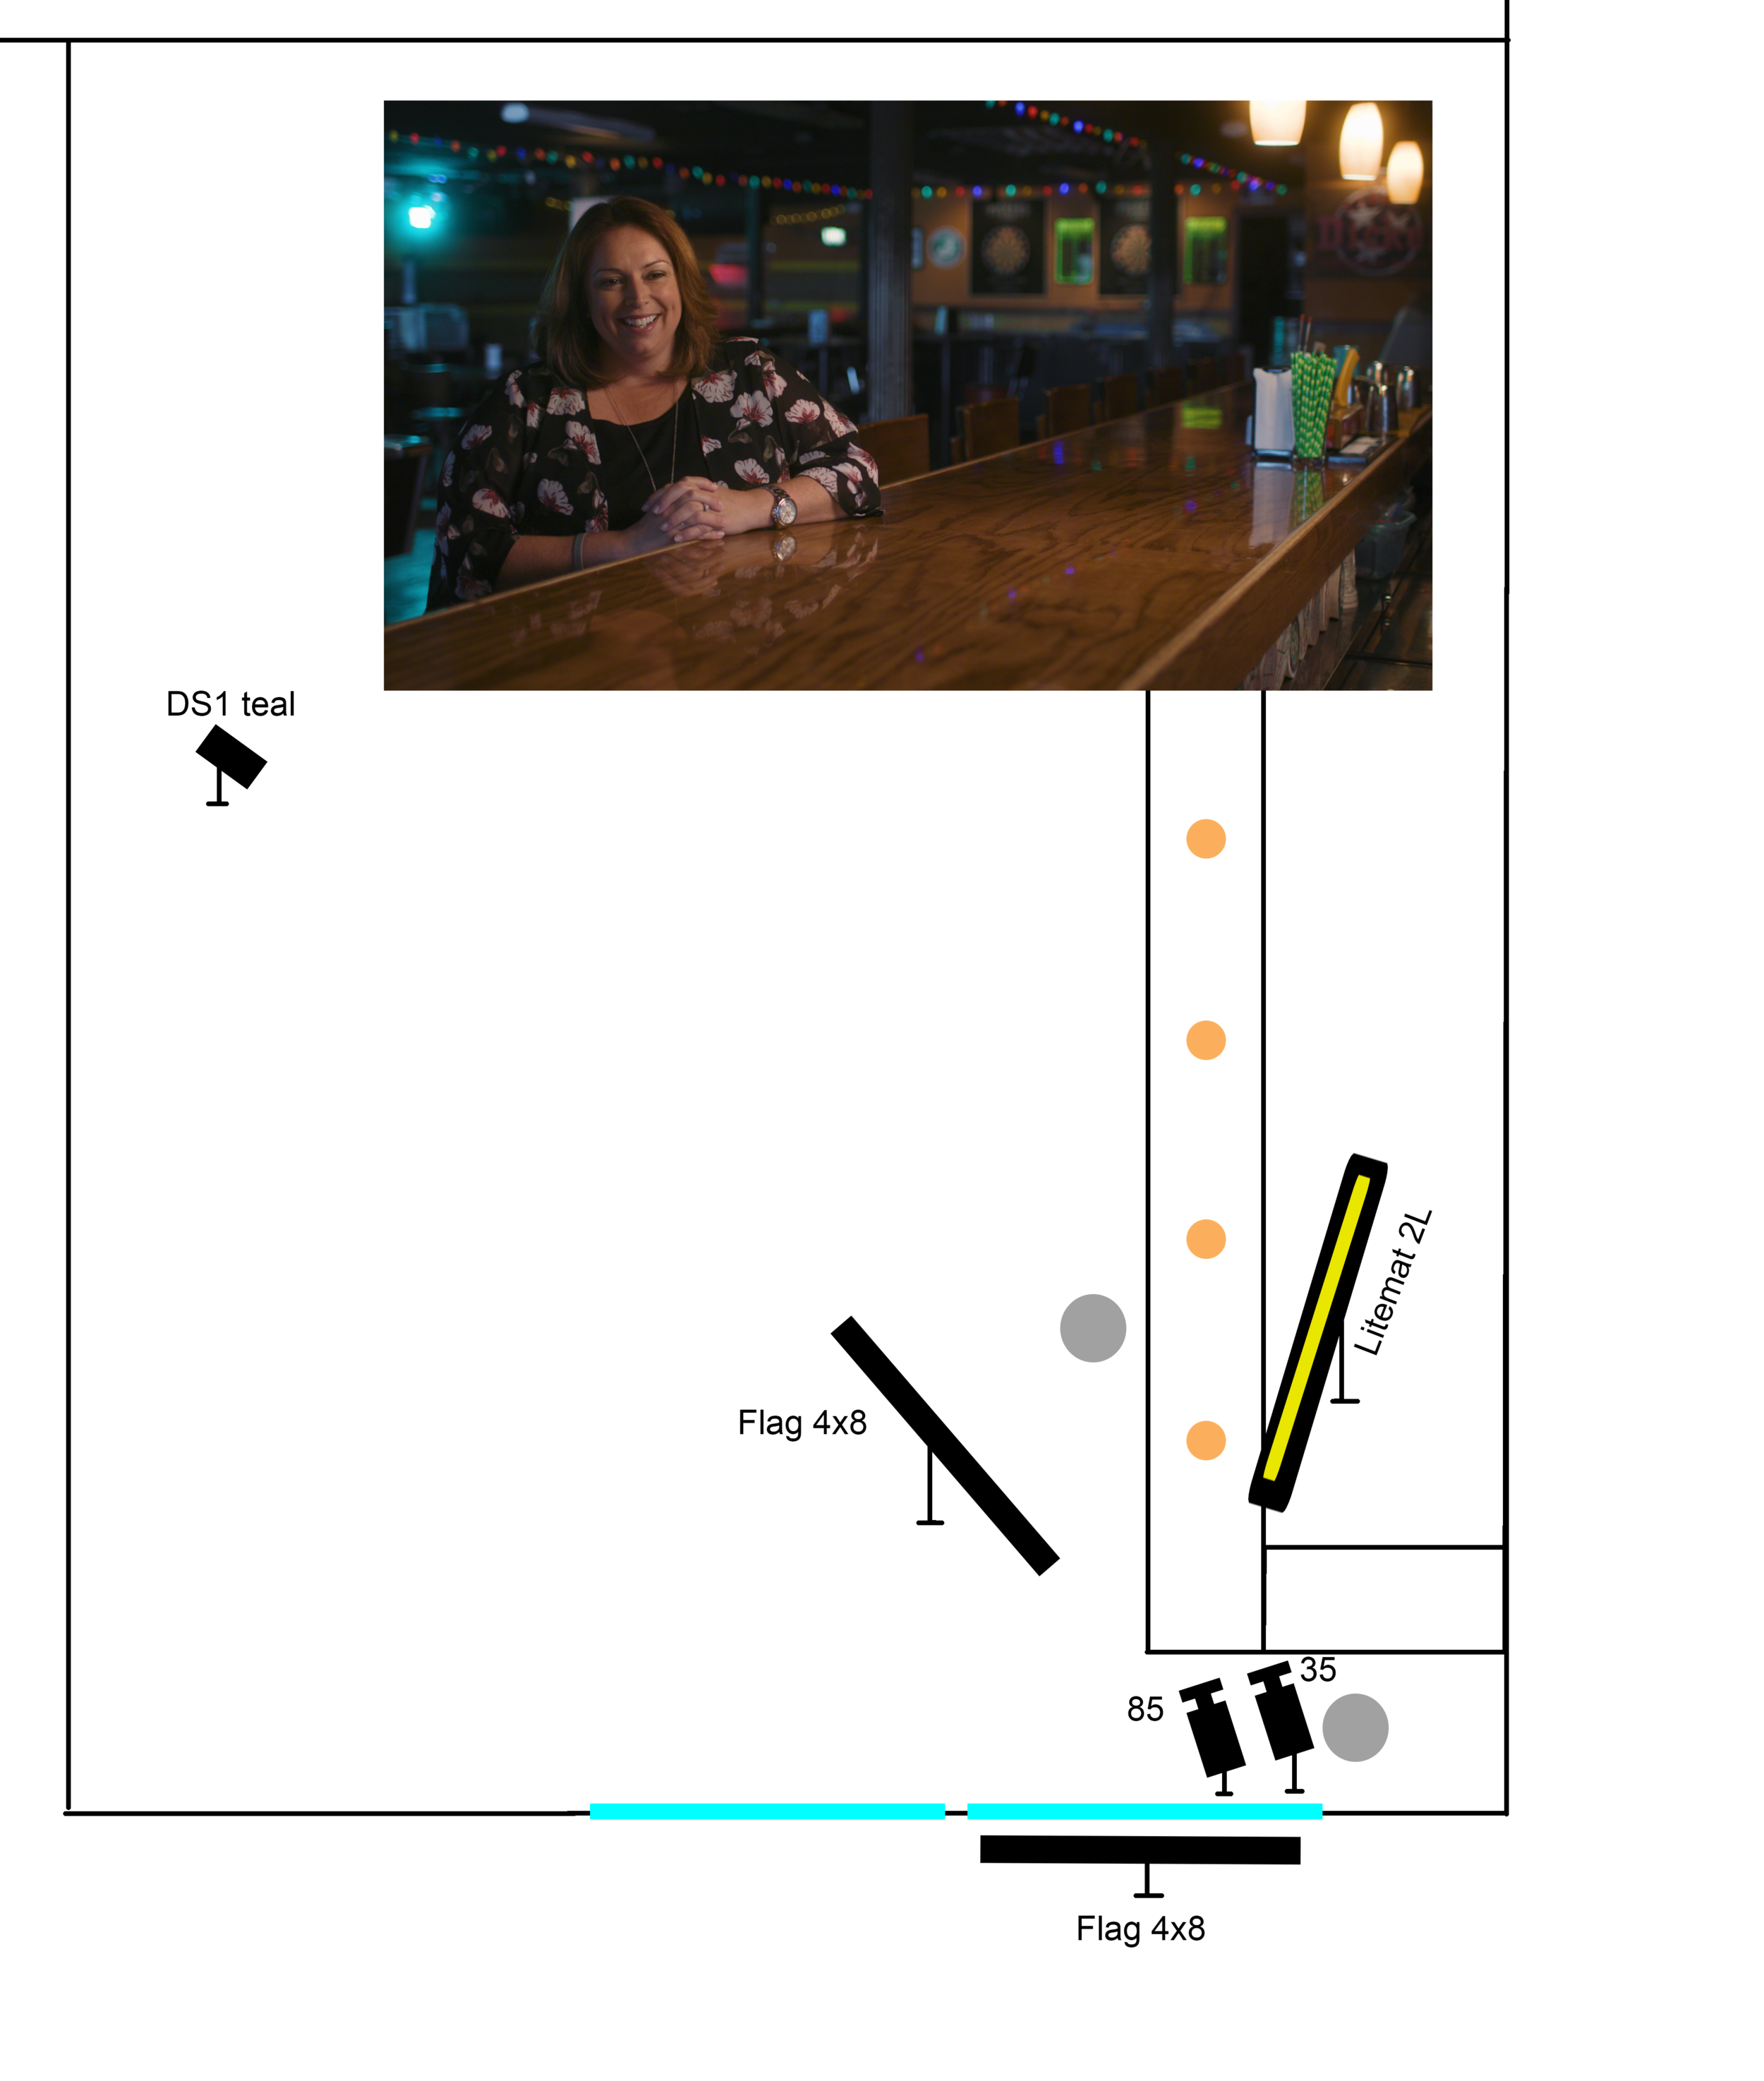
Our producer told me they wanted something at the bar for this setup. I began looking around and decided on a frame similar to the image below. We could get some practicals into the shot and reveal a bit of the overall layout of the space as well. I made a mental note moving forward that since the first interview would be left of frame, facing the right, that we would need to flip the next interview (right of frame facing the left).
Thankfully this was a rare shoot where we had almost too many hands on deck to help out (one of our in-house editors came to watch/help, as well as an intern, myself, a second-shooter, and an associate producer).

Finished Shot - Wide - Graded - 1/4 ProMist Filter (I believe this was the 35mm). You can see the effect of the pro-mist especially on the lights in the top-right of frame.

Finished Shot - CU - Graded - 1/4 ProMist Filter (85mm)
The first setup wasn’t TOO terribly involved. In the wide you can see the ds1 in the background splashing teal onto what is a small disco ball (hard to tell in the image). I left it in the shot as a practical that was visible after the producer mentioned they liked it. Honestly I had thrown it up back there because of the disco ball and I’d wanted to hit it with some color for a later setup. I was going to take it down after seeing what it looked like. They just happened to mention liking the look of it before I took it down: so it stayed.
Sometimes you just luck out.
I remember exposing for the interior of the bar and turning off all of the lights except for the practicals you see in the shot: colored string lights, dartboard lights, and the bar lights. There were other lights available but they honestly took away contrast instead of helping add it.
I really, really wanted to frame at least some of the bar’s lighting into the shot so that’s why the wide has the interviewee farther from the frame than what I’d usually like to achieve. The shot just wasn’t as appealing without those lights giving some more interest to the frame and inspiration for lighting choices. If she had been closer, I would’ve had to frame from below her eye line to still show them — and that’s 9/10 times an unflattering angle for almost anyone. I tried raising the seat via some appleboxes we’d brought, but it looked really awkward. Unfortunately there was no way of lowering the lights closer to the bar.
I wish I could recall the exact color temp I went with for this one. I exposed for the background, and adjusted my white balance to a color where I felt good about what the interior looked like through the camera. I know I flagged off as much daylight as possible, and if I had to bet I was somewhere between 3500-4000K as far as white balance goes.

From the perspective of the talent. I believe I wound up scooting their chair away from the corner even more by the end of it all. We lit this entirely with practicals and the 2L litemat you see on the left with full diffusion, and eggcrate. I usually try to light and shoot into the fill-side (shocking stuff, I know). This setup also allowed for the visible practicals of the lights over the bar to help influence the lighting. The more I’ve lit interviews, the more I lean towards a light above the talent, angled down onto them as opposed to directly parallel to their face. The resulting shadows are more pleasing to my taste (and more resemble “Rembrandt lighting” as well).
The flag was there to kill as much daylight as possible — and help add more contrast, and there is another flag blocking a window directly behind the two cameras. You can see the producer to the left of the wide camera, as well as my second-shooter operating the wide camera in this shot.
In hindsight I do wish I’d added a light directly overhead, slightly behind the talent just for a little more separation, but I can easily live with what we got in the time we had to get it.
Very sloppy representation of the lighting for this setup.